
Lighting is one of the most important parts of any bathroom remodel, yet it’s always overlooked. The right bathroom lighting can make your space feel bigger, brighter, and more relaxing, while poor lighting can leave it looking dull and impractical. Whether you’re getting ready in the morning or winding down at night, choosing the right lighting for your bathroom remodel ensures your space works for both function and comfort.
In this guide, we’ll walk you through the key things you need to know—like the best types of lighting, smart placement and safety tips to create a bathroom that feels both stylish and practical. By the end, you’ll know exactly how to layer your lights, pick the right bulbs and avoid common mistakes so your new bathroom shines in the best way possible.
Why Bathroom Lighting Matters
When planning a bathroom remodel, most people focus on tiles, fixtures, and storage. But what truly brings the space to life is the lighting. Without proper lighting, even the most beautiful bathroom can feel gloomy, uninviting or difficult to use. This is why choosing the right lighting for your bathroom remodel is just as important as selecting the right materials or finishes. Good lighting not only improves how your bathroom looks but also makes everyday tasks easier and safer.
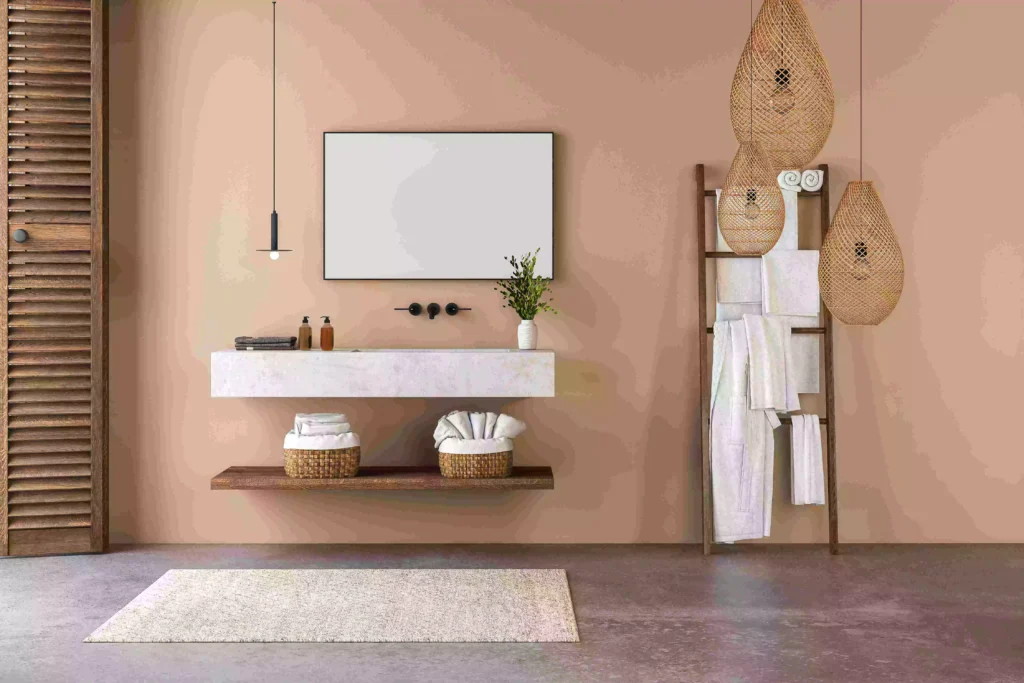
Here are the key reasons why bathroom lighting matters and how the right choices can transform your space:
1. Lighting Improves Functionality
Bathrooms aren’t just about style they are working spaces. You need clear, bright light for shaving, applying makeup, or brushing your teeth. Relying on a single overhead fixture always creates harsh shadows, making these tasks harder. Well-placed vanity lights or sconces at eye level eliminate shadows and give you a true reflection. With the right task lighting, you’ll never have to struggle with uneven light again.
2. Lighting Creates the Right Mood
A bathroom is more than a place for quick routines it can also be your private retreat after a long day. Lighting plays a big role in setting the mood. Soft, dimmable lights can create a spa-like feel, while brighter lighting helps energize you in the morning. The ability to adjust brightness lets you switch easily between practical use and relaxation. This flexibility turns an ordinary bathroom remodel into a space that works for every moment.
3. Lighting Enhances Design and Style
Even the most carefully chosen finishes won’t shine without proper lighting. The right bathroom lighting highlights design elements like tile patterns, mirrors, or custom vanities. Accent lighting, such as under-cabinet LEDs or backlit mirrors, adds depth and makes the space look more polished. If you have invested in a remodel, you want every detail to stand out and lighting ensures that it does.
4. Lighting Improves Safety
Bathrooms are naturally high-moisture spaces, which makes safety a top concern. Poor lighting can increase the risk of slips and falls, especially for children or aging family members. Bright, well-placed lighting in key areas like showers, tubs, and floors helps everyone move around with confidence. Fixtures with the proper moisture rating also ensures they’re safe to use in damp conditions a must in Canadian homes where humidity can be high.
5. Lighting Affects Energy Efficiency
Outdated bathroom lighting often uses more electricity than needed. Modern LED fixtures give you bright, reliable light while using far less energy. They last longer too, which saves money on replacements. When planning a remodel, upgrading to LED bathroom lighting is one of the easiest ways to make your home more energy-efficient without sacrificing style or brightness.
6. Lighting Adds Value to Your Remodel
Homebuyers in Toronto and the GTA often pay close attention to bathrooms. A well-lit bathroom feels larger, more modern, and more inviting, which can make your home stand out in the market. By investing in layered, thoughtful lighting during your remodel, you’re not just improving daily living—you’re also increasing your property’s appeal and potential value.
7. Lighting Prevents Common Mistakes
One of the biggest mistakes homeowners make is installing a single overhead light and assuming it’s enough. This often leads to harsh shadows, unflattering reflections, and dim corners. Another common error is ignoring colour temperature—bulbs that are too cool can make your space feel clinical, while overly warm bulbs may not provide enough clarity for tasks. Understanding these pitfalls and addressing them with layered lighting ensures your remodel looks and feels complete.
Layered Lighting: The 3 Must-Have Zones
When it comes to choosing the right lighting for your bathroom remodel, one light fixture simply isn’t enough. A well-designed bathroom uses a layered lighting plan with three essential zones: ambient lighting, task lighting, and accent lighting. Each serves a unique purpose, and together they create a space that is practical, comfortable, and visually appealing.

Here’s a step-by-step breakdown of how each layer works and why all three are important.
1. Ambient Lighting – The Foundation
What it is:
Ambient lighting is the main source of light in your bathroom. It sets the overall tone and brightness of the room, similar to natural daylight.
How to achieve it:
- Popular options include recessed ceiling lights, flush-mount fixtures, or a central ceiling light.
- For larger bathrooms, a grid of recessed LED lights ensures even coverage.
- For smaller spaces, one well-placed ceiling light may be enough.
Why it matters:
- Without proper ambient lighting, your bathroom can feel dim or uneven.
- Good ambient lighting helps you see the entire room clearly, making it safer and easier to use.
- Aim for about 50 lumens per square foot to ensure your bathroom is well lit.
Pro Tip for Toronto homes:
If your bathroom lacks windows or natural light (common in condos), stronger ambient lighting will help make the space feel open and airy.
2. Task Lighting – Focus Where You Need It
What it is:
Task lighting provides focused brightness for everyday activities like shaving, brushing your teeth, or applying makeup. It is the most functional layer in a bathroom lighting plan.
How to achieve it:
- The best placement is at eye level on both sides of your vanity mirror using wall sconces. This prevents harsh shadows on your face.
- Space the sconces about 36–40 inches apart, depending on the size of your mirror.
- If side sconces aren’t possible, an LED strip or lighted mirror can be a good alternative.
Why it matters:
- Overhead vanity lights often create unflattering shadows under the eyes and chin. Task lighting eliminates this problem.
- Proper task lighting ensures accuracy when applying makeup or grooming.
- It makes daily routines faster and more comfortable.
Pro Tip for families:
Choose LED bulbs with a CRI (Colour Rendering Index) of 90 or above to ensure true colour reflection—essential for makeup and precise grooming.
3. Accent Lighting – The Final Touch
What it is:
Accent lighting adds depth and personality to your bathroom. It highlights special design elements and creates a spa-like atmosphere.
How to achieve it:
- Install LED strips under floating vanities or along shelves.
- Backlight your mirror for a modern glow.
- Use small spotlights to highlight tile walls, artwork, or architectural features.
- In larger bathrooms, a decorative chandelier or pendant light can double as accent and ambient lighting.
Why it matters:
- Accent lighting makes your remodel feel complete and stylish, not just functional.
- It creates a luxurious vibe, especially when paired with dimmers.
- Adds value by showcasing your bathroom’s design details.
Pro Tip for mood setting:
Install accent lighting with dimmer switches. This lets you turn bright lights into a relaxing glow—perfect for evening baths.
Choosing Bulbs: Temperature, CRI & Energy
Even with the best fixtures, your bathroom won’t feel right if you use the wrong bulbs. When choosing the right lighting for your bathroom remodel, three factors matter most: colour temperature, CRI (Colour Rendering Index), and energy efficiency. Understanding these will help you select bulbs that make your bathroom look bright, natural, and welcoming—while keeping energy costs low.
Here’s a step-by-step breakdown of what you need to know.
1. Colour Temperature – Setting the Mood
What it means:
Colour temperature refers to how “warm” (yellow) or “cool” (blue) the light appears. It’s measured in Kelvins (K).
Steps to choose the right colour temperature:
- 2700K–3000K (Warm White): Soft, cozy light that feels inviting. Best for accent lighting or relaxing bath zones.
- 3500K–4000K (Neutral White): Balanced light that feels natural. Ideal for general bathroom use.
- 5000K (Daylight): Bright, crisp light that mimics natural daylight. Best for detailed grooming and makeup application.
Why it matters:
- Too warm, and the bathroom can look dim or yellow.
- Too cool, and the space may feel clinical or harsh.
- The sweet spot for most bathrooms is 3000K–4000K, which gives a clean yet comfortable glow.
Pro Tip for Canadian homes:
If your bathroom has little or no natural light (common in condos), consider 4000K for a fresher, daylight-like feel.
2. CRI (Colour Rendering Index) – Seeing True Colours
What it means:
CRI measures how accurately a light source shows colours compared to natural daylight, on a scale of 0–100.
Steps to choose the right CRI:
- Look for bulbs with CRI 90 or higher—this ensures skin tones, makeup, and décor colours appear true.
- Avoid low-CRI bulbs (below 80), which distort colours and make mirrors less reliable.
- Many LED bulbs list their CRI on the packaging—always check before buying.
Why it matters:
- High CRI lighting prevents makeup mishaps by showing colours accurately.
- It helps you see textures and finishes in tiles, countertops, and cabinetry.
- A bathroom remodel deserves lighting that enhances—not dulls—your design.
Pro Tip for vanity lighting:
Pair a CRI 90+ bulb with 3500K–4000K colour temperature for the most flattering mirror lighting.
3. Energy Efficiency – Save Money & the Environment
What it means:
Energy efficiency determines how much electricity a bulb uses compared to the brightness it gives.
Steps to choose energy-efficient bulbs:
- LEDs are the top choice—they last up to 25,000 hours and use 75% less energy than incandescent bulbs.
- Look for ENERGY STAR® certified bulbs for guaranteed savings and reliability.
- Choose dimmable LEDs if you want flexible lighting for both daily use and relaxation.
Why it matters:
- Reduces monthly hydro bills in Toronto and across Canada.
- Minimizes heat output, keeping your bathroom cooler.
- Eco-friendly choice with less frequent bulb replacements.
Pro Tip for longevity:
Invest in high-quality LED bulbs from reputable brands. Cheaper bulbs may flicker, burn out faster, or give inconsistent colour temperatures.
4. Putting It All Together
When choosing bulbs for your bathroom remodel, always evaluate them based on three key factors:
- Temperature: 3000K–4000K for most bathrooms, with 5000K for task-heavy grooming zones.
- CRI: 90+ for accurate colours in mirrors and décor.
- Energy efficiency: LED bulbs with ENERGY STAR® certification.
By following these steps, you’ll ensure that your bathroom lighting is not only stylish but also functional and cost-effective. The right bulb selection can make the difference between a harsh, uncomfortable space and a spa-like retreat that works perfectly for your needs.
Placement, Safety & Code Compliance
When planning your bathroom remodel, choosing the right lighting is only half the job—placement and safety are just as important. Poorly positioned fixtures can create shadows, glare, or even hazards. Following proper placement guidelines and meeting electrical codes ensures your bathroom looks great and stays safe. Here’s a step-by-step guide.
1. Understand Bathroom Lighting Zones
Bathrooms are divided into “zones” based on how close fixtures are to water. These zones dictate what type of lights can be safely installed.
Steps to follow:
- Zone 0: Inside the shower or bathtub. Fixtures must be low-voltage and rated IP67 (completely waterproof).
- Zone 1: Above the shower or tub up to 2.25m (7.5 ft). Requires IP65-rated lights to resist water spray.
- Zone 2: Within 0.6m (2 ft) of the tub, shower, or sink. Fixtures should be damp-rated or IP44.
- Outside zones: Anywhere else. Standard damp-rated fixtures are usually fine.
Pro Tip for Canadian homes: Always check with the Ontario Electrical Code or your local authority in the GTA before finalizing fixtures.
2. Safe Placement Around the Vanity
The vanity area is where you need the most accurate lighting, especially for grooming.
Steps to follow:
- Avoid overhead-only lighting. A single ceiling light casts shadows under the chin and eyes.
- Install sconces at eye level (about 65–70 inches from the floor) on either side of the mirror. This provides even, shadow-free illumination.
- For larger mirrors, consider an integrated LED mirror for balanced, modern lighting.
Why it matters:
Well-placed vanity lights improve makeup application, shaving, and overall visibility—without harsh glare.
3. Shower & Bathtub Lighting Placement
Bathrooms with enclosed showers or deep tubs need dedicated lighting to avoid dark corners.
Steps to follow:
- Use recessed LED lights rated for wet locations (IP65 or higher).
- Place them directly above the shower or tub, spaced evenly for full coverage.
- Choose bulbs in the 3000K–4000K range for a natural yet comfortable feel.
Safety note: Never install non-rated fixtures above showers or tubs—this can lead to electrical hazards.
4. General Lighting for the Entire Bathroom
Even with task lighting in place, you’ll need ambient lighting to fill the room.
Steps to follow:
- Position ceiling lights centrally or in multiples for even coverage.
- Consider flush-mount or semi-flush fixtures for smaller bathrooms.
- In larger spaces, recessed lighting grids ensure no dark spots remain.
Pro Tip: Use dimmable LEDs so you can adjust brightness for morning routines vs. evening relaxation.
5. Code Compliance & Electrical Safety
Canada has strict electrical codes to keep bathrooms safe. Working with a licensed electrician ensures compliance and reduces risks.
Steps to follow:
- Install GFCI-protected outlets near sinks and vanities. These outlets shut off power instantly if water contact occurs.
- Use only damp- or wet-rated fixtures in bathrooms. This is non-negotiable.
- Ensure all fixtures near water sources meet CSA approval (Canadian Standards Association).
- Keep switches outside the shower zone and ideally away from direct water contact areas.
Why it matters:
Ignoring electrical codes not only risks safety but can also affect home insurance claims if accidents occur.
6. Practical Tips for Homeowners
- Hire professionals: DIY electrical work in bathrooms is risky and may void compliance.
- Plan before installation: Sketch fixture placement early in your remodel to avoid costly rework.
- Balance aesthetics with safety: Sleek designs are great, but never compromise on water ratings or electrical rules.
7. Putting It All Together
When choosing the right lighting for your bathroom remodel, remember that placement and safety are as important as style. By following bathroom zone rules, installing fixtures at the correct heights, and ensuring compliance with Canadian codes, you’ll create a bathroom that’s both beautiful and safe.
Proper lighting placement doesn’t just highlight your remodel—it protects your family and guarantees your investment lasts for years.
Energy, Dimmers & Smart Controls
When it comes to choosing the right lighting for your bathroom remodel, the fixtures and bulbs are only part of the equation. To make your space truly functional and energy-efficient, you’ll also want to consider how you control your lighting. From dimmers to smart switches, these upgrades can help you save energy, reduce costs, and customize your bathroom experience.
Here’s a step-by-step breakdown.
1. Energy Efficiency – Saving Money & the Planet
Bathrooms are high-use spaces, so the energy demands of your lighting system matter.
Steps to maximize efficiency:
- Switch to LEDs: They use up to 75% less energy than incandescent bulbs and last far longer.
- Choose ENERGY STAR® bulbs and fixtures: These meet strict efficiency guidelines and are widely available in Canada.
- Install motion sensors or timers: Perfect for kids’ bathrooms, these controls prevent lights from being left on unnecessarily.
- Pair efficiency with design: Modern LED fixtures come in styles that enhance both aesthetics and savings.
Why it matters:
Lower hydro bills, less frequent bulb replacement, and a more eco-friendly bathroom remodel.
2. Dimmers – Control the Mood
A bathroom serves different purposes throughout the day: bright task lighting in the morning and softer, relaxing light in the evening. Dimmers let you adjust brightness on demand.
Steps to add dimmers effectively:
- Use dimmable LEDs: Not all LED bulbs work with dimmer switches, so check packaging before buying.
- Install dimmers for vanity and ceiling lights: This allows you to set the right mood depending on the activity.
- Choose smart dimmers if you want app or voice control (works with Alexa, Google, or Apple Home).
- Opt for separate dimmer zones: For example, keep vanity lights bright while dimming ambient ceiling lighting for a bath.
Why it matters:
Dimmers enhance comfort, improve energy savings, and allow you to create a spa-like experience at home.
3. Smart Lighting Controls – The Modern Upgrade
Smart technology is making its way into Canadian bathrooms, offering convenience and personalization.
Steps to incorporate smart lighting:
- Smart bulbs: Simple option—replace standard bulbs with Wi-Fi or Bluetooth-enabled LEDs.
- Smart switches: Control multiple fixtures at once, ideal for remodels with layered lighting zones.
- Voice control integration: Hands-free operation through Google Home, Alexa, or Siri.
- Programmable schedules: Automate bathroom lights to dim in the evening or brighten at sunrise.
- Colour tuning: Some smart LEDs allow you to adjust both brightness and colour temperature (warm to cool) depending on your needs.
Why it matters:
Smart controls offer ultimate flexibility, accessibility, and customization, turning your bathroom into a truly modern space.
4. Safety & Compatibility Considerations
Whenever you add new controls, you’ll want to ensure they’re safe and compatible.
Steps to ensure safe installation:
- Work with a licensed electrician to install dimmers and smart switches safely.
- Check compatibility between bulbs and dimmers—improper pairing can cause flickering or buzzing.
- Choose damp-rated smart devices if they’re near high-humidity areas like showers.
- Plan electrical load: Ensure the bathroom’s circuit can handle the new technology, especially if adding multiple fixtures.
Why it matters:
Safe, compliant installation prevents costly electrical issues and ensures your remodel passes inspections.
5. Putting It All Together
When planning your bathroom remodel, don’t stop at fixtures—consider how you’ll control your lights. By combining energy-efficient LEDs, dimmer switches, and smart controls, you can create a space that’s not only beautiful but also functional, eco-friendly, and future-ready.
Imagine this: bright, daylight-like lighting in the morning for your routine, soft dimmed light for evening relaxation, and smart automation that saves energy even when you forget to turn the switch. That’s the true value of pairing energy, dimmers, and smart controls with your bathroom remodel.
Quick Overview: Lighting Checklist
When choosing the right lighting for your bathroom remodel, the number of options can feel overwhelming. To simplify the process, here’s a step-by-step bathroom lighting checklist you can follow to make sure nothing gets overlooked.
1. Plan for Layered Lighting
Steps to check off:
- Include ambient lighting for overall brightness.
- Add task lighting around the vanity for grooming.
- Consider accent lighting to highlight design features or create a spa-like vibe.
✅ Why it matters: Each layer has a role, and together they create balance. Skipping one often leaves your bathroom either too dim or too harsh.
2. Choose the Right Bulbs
Steps to check off:
- Select a colour temperature between 3000K–4000K for natural, comfortable light.
- Ensure bulbs have a CRI of 90+ for true-to-life colour rendering.
- Use LED bulbs for long-lasting performance and energy efficiency.
- Look for ENERGY STAR® certification for guaranteed savings.
✅ Why it matters: The right bulb makes all the difference in how your bathroom feels and functions.
3. Follow Safe Fixture Placement
Steps to check off:
- Use wet-rated lights inside showers and tubs.
- Install damp-rated lights near sinks and mirrors.
- Position vanity lights at eye level on both sides of the mirror for even illumination.
- Space recessed lights evenly to avoid dark corners.
✅ Why it matters: Proper placement ensures safety, reduces shadows, and complies with Canadian electrical codes.
4. Add Dimmers & Controls
Steps to check off:
- Use dimmers for vanities and ceiling fixtures to control brightness.
- Install separate zones (vanity, shower, ambient) for maximum flexibility.
- Consider motion sensors or timers for kids’ or guest bathrooms.
- Upgrade to smart controls for voice commands, schedules, or app-based dimming.
✅ Why it matters: Lighting control lets you customize the mood, save energy, and extend bulb life.
5. Prioritize Safety & Compliance
Steps to check off:
- Use GFCI outlets near vanities for electrical protection.
- Confirm all fixtures are CSA-approved for Canadian standards.
- Place switches outside wet zones to reduce hazards.
- Hire a licensed electrician for installation to guarantee compliance.
✅ Why it matters: Safety and code compliance are non-negotiable—cutting corners here can risk accidents and insurance issues.
6. Don’t Forget Design Details
Steps to check off:
- Match fixture styles to your bathroom’s overall theme.
- Use finishes (chrome, matte black, brass) that complement faucets and hardware.
- Consider backlit mirrors or under-cabinet LEDs for a modern look.
- Test lighting at different times of day to ensure it works in all conditions.
✅ Why it matters: Lighting is both functional and aesthetic—it should enhance your remodel, not just illuminate it.
7. Final Walkthrough Before Installation
Steps to check off:
- Review your lighting plan with your contractor or electrician.
- Confirm fixture placement against your bathroom layout.
- Double-check wattage, dimmer compatibility, and smart system integration.
- Set aside a budget for quality fixtures don’t compromise on lighting after investing in a remodel.
✅ Why it matters: A final check helps catch mistakes before installation, saving time and money.
Conclusion
Lighting can make or break the look and feel of your bathroom. By choosing the right lighting for your bathroom remodel, you’ll create a space that is functional, safe, and visually stunning. From layering ambient, task, and accent lighting to selecting the right bulbs, placement, and smart controls, every detail matters. The right bathroom lighting not only improves daily routines like grooming but also transforms your space into a spa-like retreat. With energy-efficient LEDs, code-compliant fixtures, and smart dimmers, you can achieve the perfect balance of beauty, safety and efficiency. Plan carefully, and your bathroom remodel will shine for years to come.
FAQs
-
What type of lighting is best for a bathroom remodel?
The best lighting for a bathroom remodel is a mix of ambient, task, and accent lighting. Ambient lights brighten the whole room, task lighting improves grooming at the vanity, and accent lighting highlights design features for a modern finish.
-
What colour temperature is best for bathroom lighting?
For most bathrooms, a 3000K–4000K colour temperature works best. It provides a clean, natural look without feeling too harsh or too yellow, making it ideal for grooming and relaxation.
-
Do I need special light fixtures for the shower?
Yes. Shower and bathtub zones require wet-rated or IP65 fixtures to handle moisture safely. Regular fixtures can pose safety risks if used in wet areas.
-
How do I make my bathroom lighting energy-efficient?
Switching to LED bulbs, installing dimmers, and using motion sensors or smart controls can greatly improve energy efficiency. ENERGY STAR® certified products also reduce hydro costs while lasting longer.
-
Can bathroom lighting affect how I look in the mirror?
Absolutely. Low-quality or poorly placed bulbs can cast shadows and distort colours. Choosing bulbs with a CRI of 90+ and proper placement at eye level ensures accurate reflection and true-to-life colours.