Choosing the right showerhead can make a big difference in your daily routine. Whether you’re starting your morning or winding down at night, the way water flows can affect comfort, relaxation, and even water usage. Two popular options are rain shower heads and handheld showerheads—but which one is better for your bathroom?
In this blog, we’ll break down the key differences between rain shower vs handheld showerheads, helping you decide which is right for your needs, space, and budget. Whether you’re planning a full bathroom renovation or just want to upgrade your shower, we’ve got you covered with simple, honest advice.
Table of Contents
Water Damage Risks During Bathroom Renovations
When upgrading your bathroom, one of the biggest concerns homeowners often overlook is water damage. Whether you’re installing a rain shower or handheld showerhead, improper planning or installation can lead to serious issues behind the walls and under the floor.
1. Improper Waterproofing
Without proper waterproofing behind the tiles, water can slowly seep into the walls, causing mold, mildew, and rot. This is especially risky with rain showers, which often cover a larger surface area. Always make sure professionals install a reliable waterproof membrane before laying tiles or fixtures.
2. Leaky Shower Fixtures
If the rain shower or handheld unit isn’t sealed correctly, even a small leak can result in long-term damage. Leaks often go unnoticed until it’s too late, so hiring a licensed installer is key to avoiding costly repairs later.
3. Drainage and Slope Issues
A common mistake during bathroom renovations is incorrect floor sloping. If water doesn’t flow properly into the drain, it can pool and eventually cause structural damage. This is especially important when switching from a standard head to a rain shower, which delivers water straight down and over a wider area.
4. Outdated Plumbing
Renovating is the perfect time to inspect and upgrade your plumbing. Old pipes can corrode or crack, increasing the risk of leaks. Whether you choose a handheld or rain showerhead, the plumbing must handle the water flow without stress or blockage.
5. Ventilation Problems
Poor ventilation traps moisture inside your bathroom, creating a breeding ground for mold. If you’re installing a rain shower, which typically produces more mist, proper fan installation becomes even more important to prevent moisture buildup.
Step‑by‑Step Preventive Renovation Guide
Planning a bathroom renovation? Whether you’re installing a rain shower or a handheld showerhead, following a step-by-step approach can help prevent costly water damage and ensure your bathroom stays beautiful and functional for years to come.
1. Assess Existing Conditions
Start by checking for any existing signs of moisture problems—such as peeling paint, musty smells, or soft drywall. Identifying these issues early allows you to fix them before installing new fixtures.
2. Hire a Professional Contractor
Always work with licensed and experienced bathroom renovation experts. A professional will know how to waterproof behind your walls, install showerheads properly, and check plumbing connections—critical steps to avoiding leaks and hidden water damage.
3. Choose the Right Fixtures
When selecting between a rain shower vs handheld showerhead, consider the flow rate, water pressure needs, and how much coverage each provides. This helps you match your choice to your space without overloading your plumbing system.
4. Waterproof Properly
Apply a waterproof membrane on all wet zones, especially around the shower area and behind tile surfaces. Waterproofing is a non-negotiable step that protects your home from mold, mildew, and long-term structural damage.
5. Inspect and Upgrade Plumbing
Renovations are the ideal time to inspect existing pipes. If your home has old plumbing, consider upgrading to modern, durable materials that handle today’s water demands—especially if you’re installing a high-pressure rainfall shower.
6. Ensure Proper Drainage
Confirm that your shower floor is correctly sloped toward the drain. Rain showers, in particular, spread water over a larger area, so poor slope or drainage can lead to standing water.
7. Ventilate Effectively
Install or upgrade your bathroom exhaust fan to handle increased humidity. This is especially important with rain showers, which produce more steam. Good ventilation prevents mold growth and helps maintain indoor air quality.
8. Test Everything Before Finishing
Before sealing walls and laying tiles, test all plumbing connections and waterproofing systems. Fix any leaks or drainage issues now to avoid costly repairs after your bathroom is complete.
Common Waterproofing and Renovation Mistakes to Avoid
Even a well-designed bathroom can suffer from long-term damage if key waterproofing and renovation steps are missed. Whether you’re installing a rain shower or a handheld showerhead, avoiding these common mistakes is essential to protect your investment and ensure a leak-free, functional space.

1. Skipping Professional Waterproofing
One of the biggest renovation mistakes is assuming basic materials like grout or caulk are enough to waterproof a bathroom. In reality, these materials are water-resistant—not waterproof. Always install a proper waterproofing membrane behind tiles, especially in wet zones like shower walls and floors.
2. Poor Showerhead Placement
Incorrectly positioning a rainfall showerhead directly above a poorly sealed area or too close to the edge of the shower can cause water to escape and seep into floors or walls. Make sure your rain shower is centered over a well-sloped drain area and surrounded by a sealed enclosure.
3. Improper Drainage Slope
If your shower floor doesn’t slope correctly toward the drain, water will pool and eventually cause water damage, mold, and mildew. This is especially important when using a rain shower, which disperses water over a wide area. Always verify that your flooring slope meets minimum drainage requirements.
4. Inadequate Ventilation
Without proper airflow, moisture lingers in the bathroom and contributes to mold growth. Many homeowners forget to install or upgrade their exhaust fan during a renovation, especially when adding high-moisture features like a rainfall showerhead. Ensure your fan is powerful enough for the size of your space.
5. Using Incorrect Materials
Not all materials are suitable for high-moisture environments. For instance, using regular drywall instead of cement board in shower areas is a costly mistake that can lead to deterioration and mold. Choose water-resistant or waterproof materials specifically designed for bathrooms.
6. Neglecting Plumbing Upgrades
If your home has outdated plumbing, adding a modern rain shower may overwhelm the system, leading to leaks or low pressure. Use your renovation as an opportunity to upgrade pipes and fittings to meet current standards and support new fixtures.
7. Rushing the Renovation Process
Waterproofing materials need adequate time to dry and cure before the next layer is applied. Rushing through these stages can compromise the waterproofing barrier and increase the risk of hidden leaks over time.
Comparative Table: Waterproofing Best Practices vs. Common Mistakes
When planning a bathroom renovation, particularly with high-moisture features like rain showers or handheld showerheads, understanding the difference between correct waterproofing methods and costly errors is crucial. Below is a clear comparison to guide homeowners and contractors toward long-lasting, leak-proof results.
| Waterproofing Best Practices | Common Waterproofing Mistakes |
| Use a waterproof membrane behind tiles in showers and wet areas | Relying only on grout or caulk to keep water out |
| Install cement board (not drywall) behind tiled walls and floors | Using standard drywall or wood behind tiles, which absorbs moisture |
| Ensure floors slope correctly toward the drain | Flat or poorly sloped floors that cause water pooling and eventual damage |
| Center rain showerheads over well-drained and sealed floor areas | Placing rainfall showerheads near edges or poorly enclosed areas |
| Seal all joints, corners, and penetrations with waterproof tape or sealant | Leaving gaps or using low-quality sealants that break down over time |
| Allow proper curing time between waterproofing layers | Rushing the renovation process without allowing materials to cure |
| Install a high-capacity exhaust fan for moisture control | Neglecting proper ventilation, which leads to mold and humidity issues |
| Upgrade old plumbing to match new water fixture requirements | Keeping outdated pipes that can’t handle rain showers or high-pressure heads |
| Choose water-resistant flooring and wall materials | Using porous materials prone to swelling, cracking, or mold growth |
| Conduct a water test before sealing up finished walls | Skipping post-installation testing, risking undetected leaks |
Benefits of Proper Water Damage Prevention
Taking steps to prevent water damage during a bathroom renovation doesn’t just protect your investment—it adds long-term value, safety, and peace of mind to your home. Whether you’re installing a rainfall showerhead, updating tiles, or replacing plumbing, here’s why proper water damage prevention is essential.
1. Protects Structural Integrity
Moisture intrusion can weaken drywall, flooring, subfloors, and even framing. Waterproofing membranes and sealed joints ensure that water stays where it belongs, especially in high-moisture zones like rain showers and tubs.
2. Prevents Mold and Mildew Growth
Improper sealing or poor ventilation often leads to mold growth, which not only causes unpleasant odours but also poses health risks. A properly waterproofed bathroom, combined with good ventilation, keeps air fresh and surfaces dry.
3. Reduces Repair and Maintenance Costs
Addressing water damage after it occurs is expensive. By using proper waterproofing techniques and materials—like sealing around handheld showerheads or applying membranes beneath tile—you avoid future costs related to rot, stains, and water leaks.
4. Increases Bathroom Longevity
Bathrooms that are protected against water intrusion last longer. Fixtures stay secure, grout and tiles remain intact, and you won’t need to renovate again for many years.
5. Improves Home Value
Homebuyers look for bathrooms that are not just stylish but well-built. A properly waterproofed bathroom with modern upgrades like rain shower systems increases buyer confidence and overall home value.
6. Enhances Daily Comfort
No one wants to deal with peeling paint, damp smells, or water pooling after every shower. Water damage prevention makes your bathroom a cleaner, safer, and more enjoyable space for everyday use.
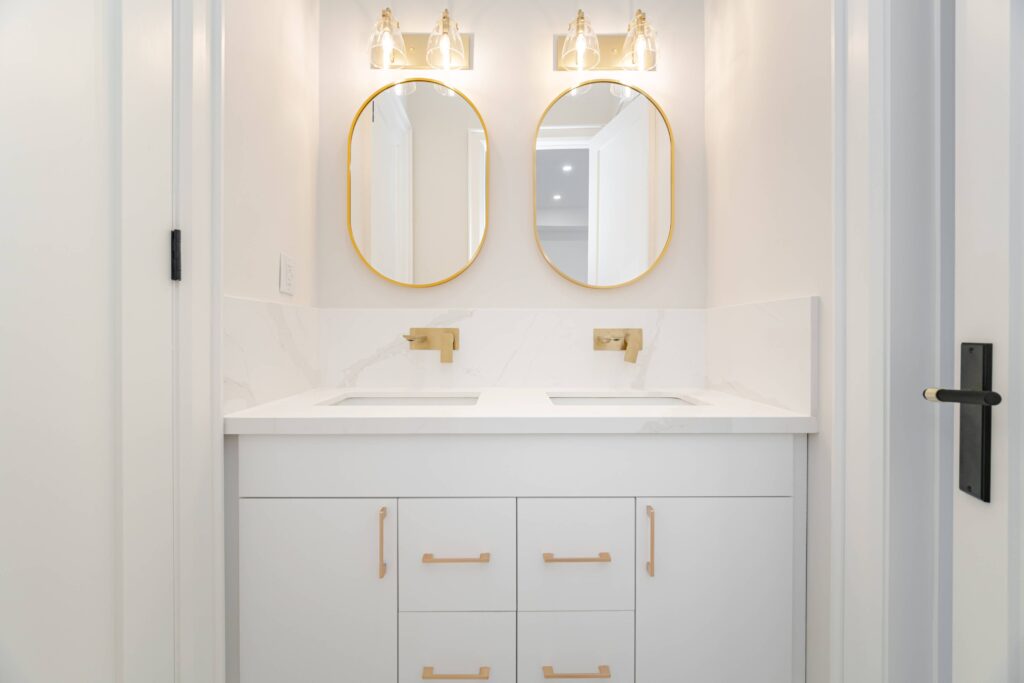
Design Considerations for Bathroom Renovations
When planning a bathroom renovation, design choices go far beyond aesthetics. Good design is about function, comfort, and water damage prevention. Whether you’re building a luxury ensuite or upgrading a compact powder room, the following design considerations can help you create a bathroom that’s beautiful, durable, and moisture-resistant.
1. Prioritize Layout for Functionality and Drainage
Plan your bathroom layout to support proper water flow and minimize water exposure. Place the shower, bathtub, and sink in locations that make it easy to install waterproof membranes and direct water toward floor drains. This reduces the risk of standing water and future leaks.
2. Choose Moisture-Resistant Materials
Always select materials specifically designed for humid environments. Opt for:
- Porcelain or ceramic tiles (non-porous)
- PVC or fibre cement wall panels
- Quartz or solid surface countertops
- Waterproof backer boards instead of drywall in wet zones
These choices improve your bathroom’s resistance to mold, mildew, and water damage over time.
3. Ventilation is Key
A well-designed ventilation system—such as a high-capacity exhaust fan or a window that opens—helps manage humidity levels, which is crucial in preventing long-term moisture issues. Place the fan near the shower or tub to ensure maximum airflow.
4. Incorporate Waterproofing Into the Design Early
Work with your contractor or designer to integrate waterproofing solutions right from the planning stage. This includes:
- Sloped flooring in the shower area
- Waterproofing membranes beneath tiles
- Sealed joints around bathtubs and shower enclosures
- Niches and benches with proper drainage design
Designing with waterproofing in mind ensures long-lasting protection.
5. Balance Style with Safety
Modern bathrooms can be both stylish and secure. Consider installing anti-slip tiles, curbless showers, and grab bars that blend seamlessly with the décor. These upgrades improve safety, especially in family homes or aging-in-place designs.
Expert Tips for Choosing the Right Option in Toronto
When it comes to planning a bathroom renovation in Toronto, selecting the right waterproofing and moisture protection methods is crucial. With the city’s cold winters, humid summers, and potential for basement dampness, homeowners must make smart choices to ensure long-term protection and comfort. Here are expert tips to help you choose the right approach:
1. Understand Your Home’s Structure and Location
Start by evaluating whether your bathroom is above ground or in the basement. Toronto homes, especially older ones, often have unique construction materials or layouts that may require specialized waterproofing solutions. Basements, in particular, are more prone to water intrusion and should be prioritized for extra sealing and drainage.
2. Choose Materials Designed for Moisture-Prone Areas
Not all building materials are created equal. Always opt for:
- Cement boards over drywall in wet zones
- Epoxy grout instead of traditional grout to prevent mildew
- Slip-resistant and non-porous tiles
These small decisions can make a big difference in preventing water damage down the road.
3. Work With Local Bathroom Renovation Experts
Hiring a trusted bathroom renovation contractor in Toronto ensures your project meets local building codes and climate demands. Local professionals understand how seasonal changes affect moisture levels and can recommend the best products and practices specific to your neighbourhood—whether you’re in downtown Toronto, Etobicoke, or North York.
4. Don’t Cut Corners on Waterproofing
It may be tempting to reduce upfront costs, but skipping or rushing the waterproofing process can lead to expensive repairs. Prioritize:
- Proper subfloor sealing
- Shower waterproof membranes
- Silicone caulking around fixtures
Investing in these steps now protects your home for years.
5. Ask About Warranties and Waterproofing Certifications
Always ask your contractor if the waterproofing products come with warranties or if their team is certified in moisture management. Top-tier renovation companies in Toronto often provide manufacturer-backed warranties, giving you peace of mind.
Conclusion
Water damage is one of the most common—and costly—issues faced during and after a bathroom renovation in Toronto. By prioritizing proper waterproofing, ventilation, and material selection, homeowners can protect their investment, prevent mold and mildew, and ensure long-term comfort. Whether you’re upgrading a small powder room or renovating a full master ensuite, working with experienced professionals ensures your bathroom is built to withstand moisture challenges. Don’t overlook the importance of planning and protection—because the best renovations are both beautiful and built to last. When in doubt, always choose quality and waterproof solutions designed for Toronto homes.
Frequently Asked Questions (FAQs)
How do I prevent water damage during a bathroom renovation?
Preventing water damage starts with using waterproof materials, installing proper ventilation, and ensuring shower and floor areas are fully sealed. Working with experienced contractors can help catch vulnerable spots early.
What type of waterproofing is best for Toronto bathrooms?
For Toronto’s climate, use a combination of cement board backers, waterproof membranes (like Schluter systems), and silicone sealing. In basements or older homes, additional measures like subfloor waterproofing may be necessary.
Can I waterproof my bathroom myself, or should I hire a pro?
DIY waterproofing is possible for small projects, but mistakes can be costly. For full renovations or basement bathrooms, hiring a professional ensures proper installation and long-term protection.
Why is bathroom ventilation important for water damage prevention?
Without proper ventilation, moisture builds up on walls and ceilings, leading to mould and structural damage. Install a high-quality exhaust fan and consider humidity-sensing options for maximum efficiency.
What are signs of poor waterproofing in a bathroom?
Common signs include peeling paint, soft drywall, musty odours, visible mould, or tile grout that’s cracking or discoloured. If you notice these, it’s time to assess and fix the issue before it worsens.